Methods for checking the flatness of the workpiece by the tool edge ruler:
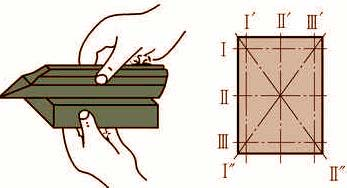
1) Put the cutter ruler vertically against the surface of the workpiece and check it step by step in the longitudinal, transverse and diagonal directions (Figure 1);

Figure 1 Use the cutter ruler to check the flatness
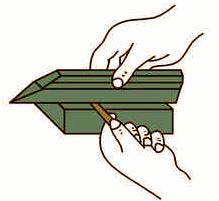
2) During the inspection, if the light transmission between the tool edge ruler and the workpiece plane is weak and uniform, the flatness of the workpiece is qualified; if the light intensity is different, it means that the workpiece plane is uneven. The toolbar can be inserted with a feeler gauge close to the toolbar and the workpiece, and the error of the planarity can be determined according to the thickness of the feeler gauge (Figure 2).

Figure 2. Measurement of plane degree error value with a feeler gauge